Appearance
Monitoring Your Charging Session
Whether you booked your session in advance or started charging instantly, the TerraFuse App makes it simple to track your EV charging from start to finish.
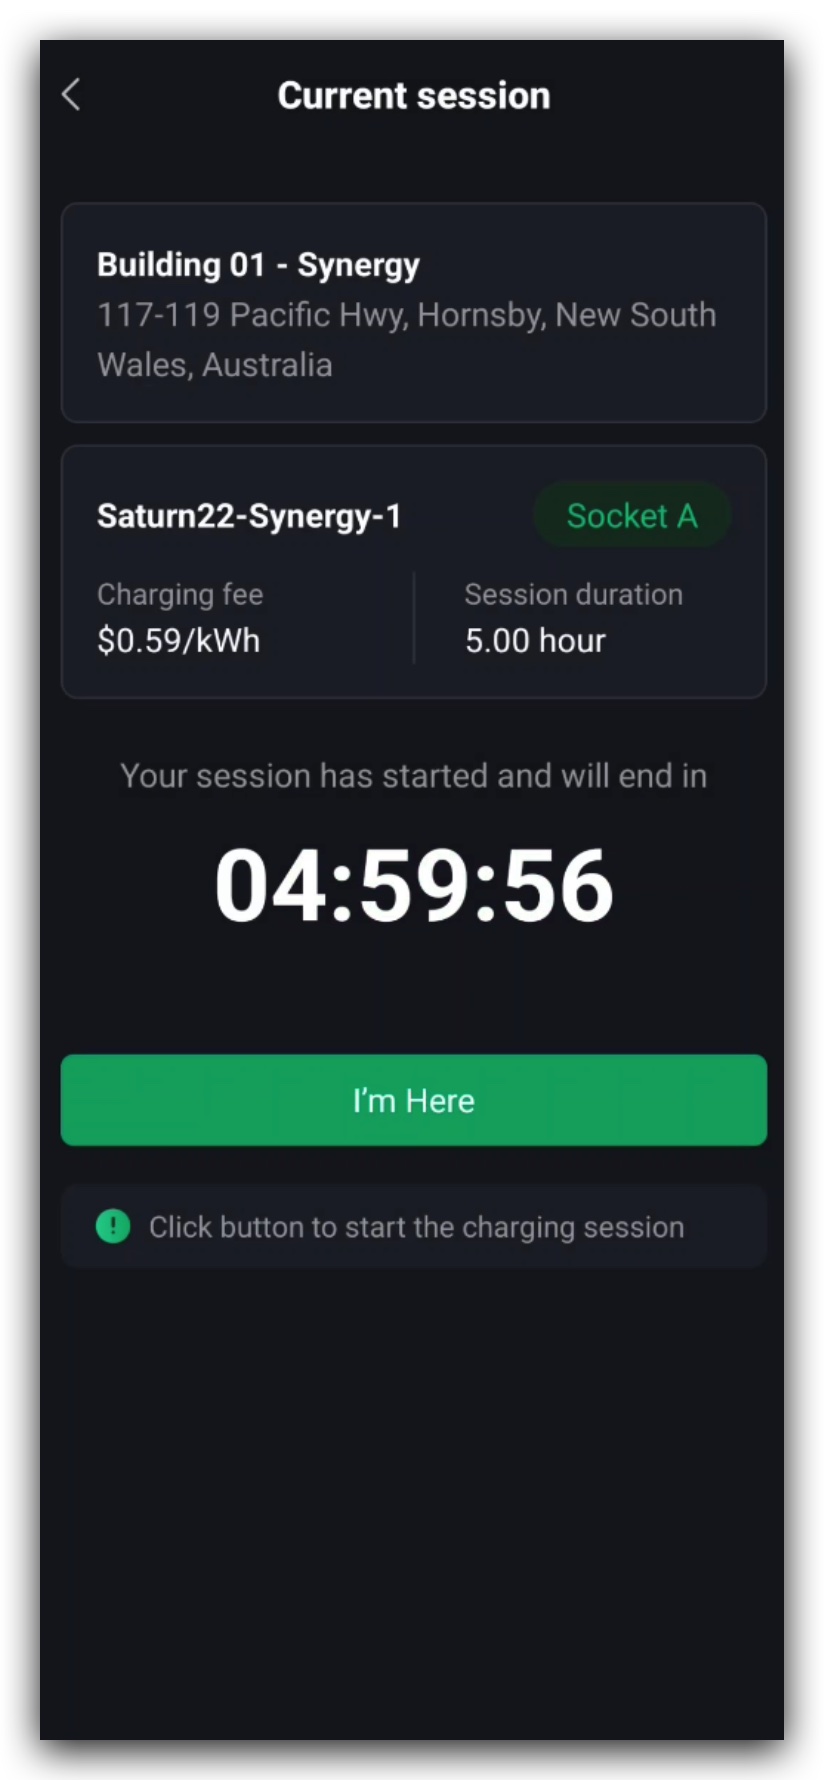
Step 1: View Your Session Details
Once your session begins, the app will display the information as shown in Figure 1.4.1:
- Building location – The site where your car is charging.
- Assigned socket – The specific charging connector allocated to you.
- Charging fee – The cost of your current session.
- Session duration – How long your charging session will run.
A countdown timer shows the time remaining based on the duration you selected.
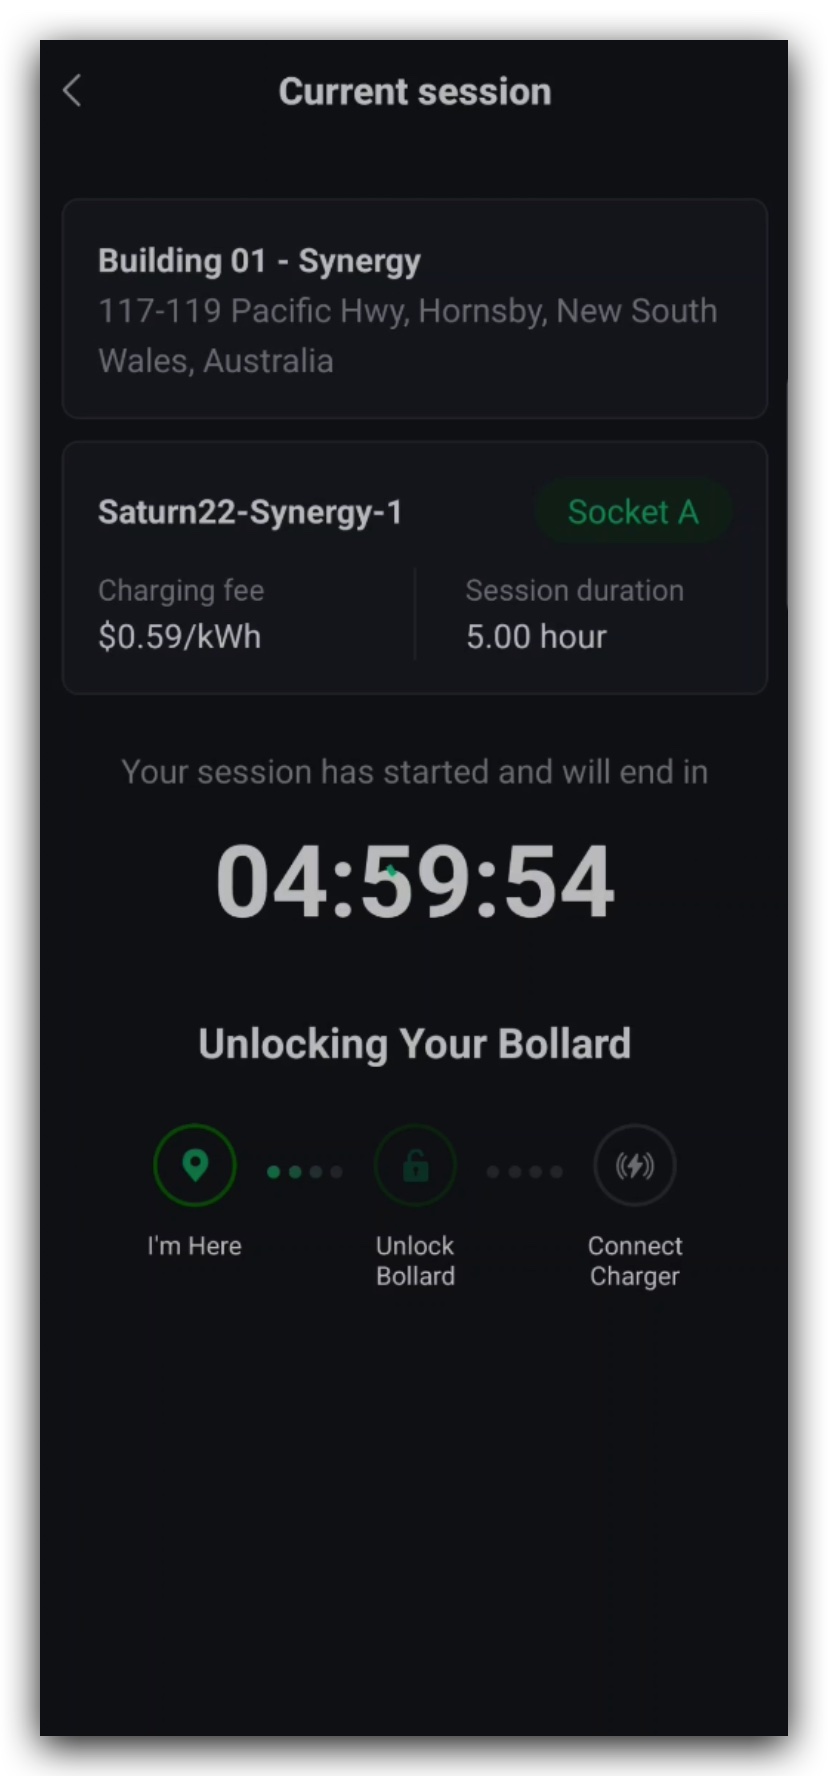
Step 2: Start Charging
- Tap "I’m Here" in the app when you arrive.
- This will lower the parking bollard for your spot (Figure 1.4.2).
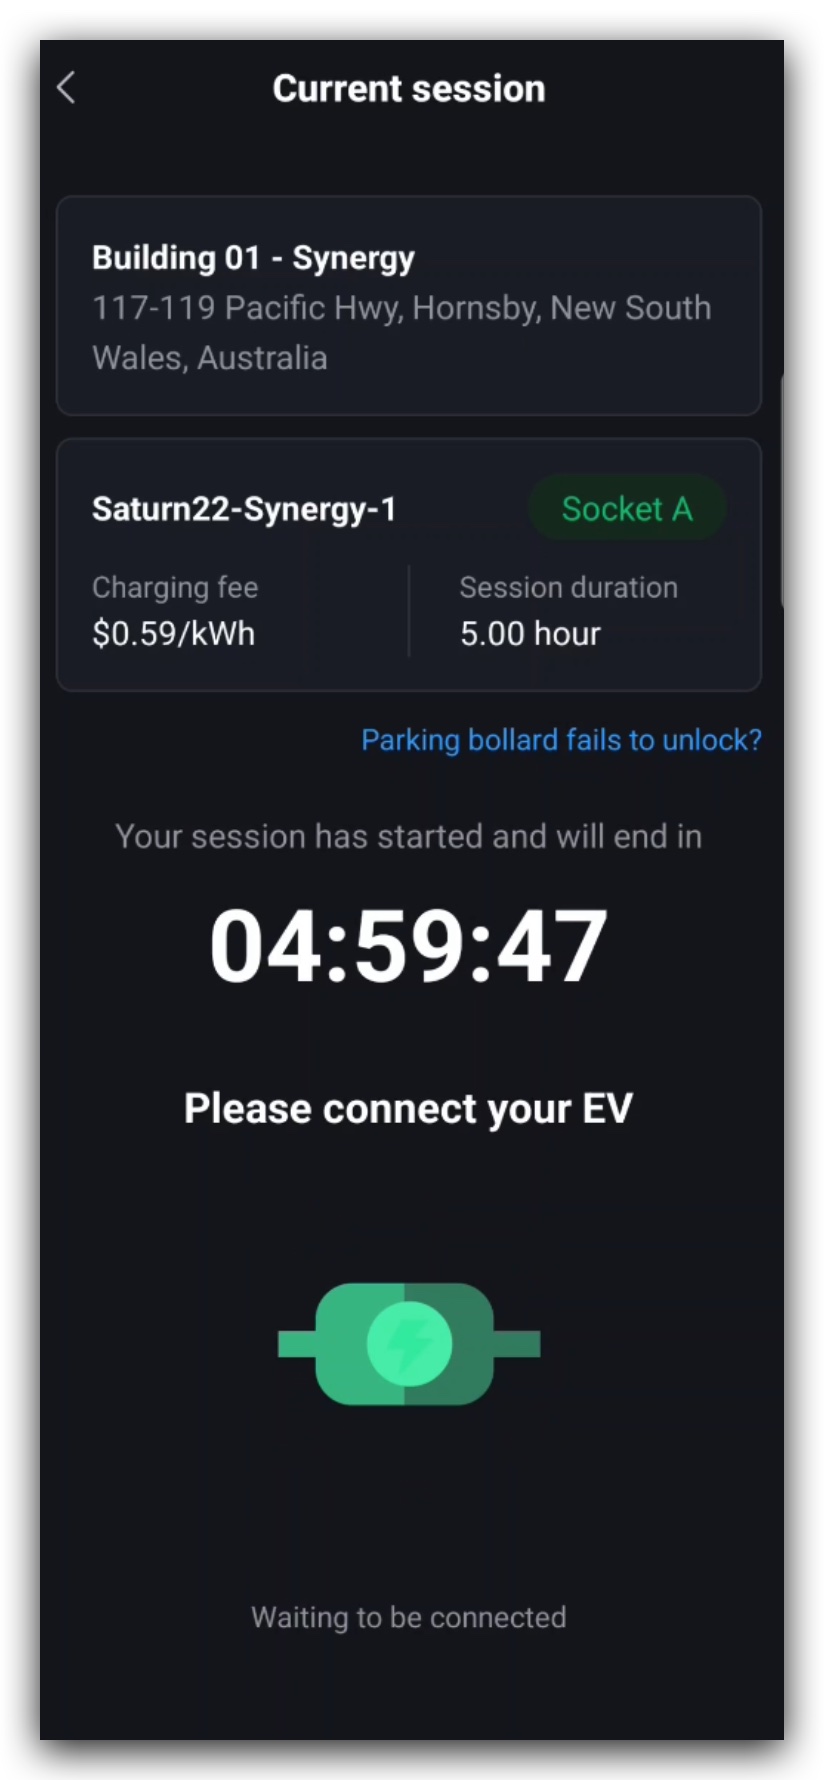
- The app will prompt you to connect the ev to the socket (Figure 1.4.3). Plug your EV into the assigned charging socket.
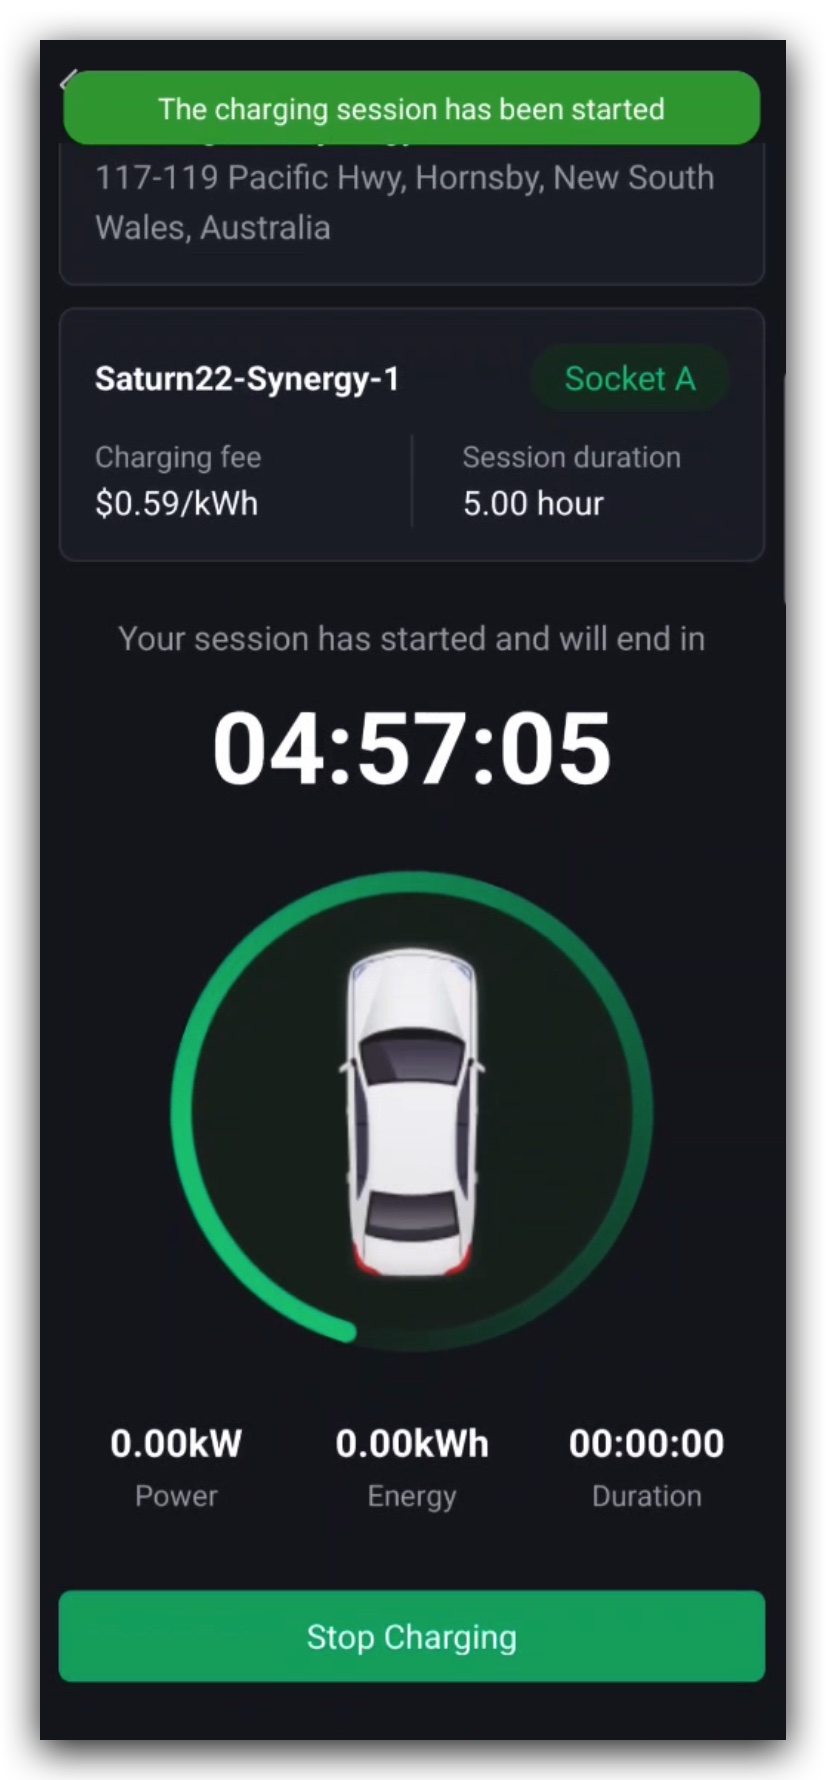
- Once connected, charging will begin automatically.
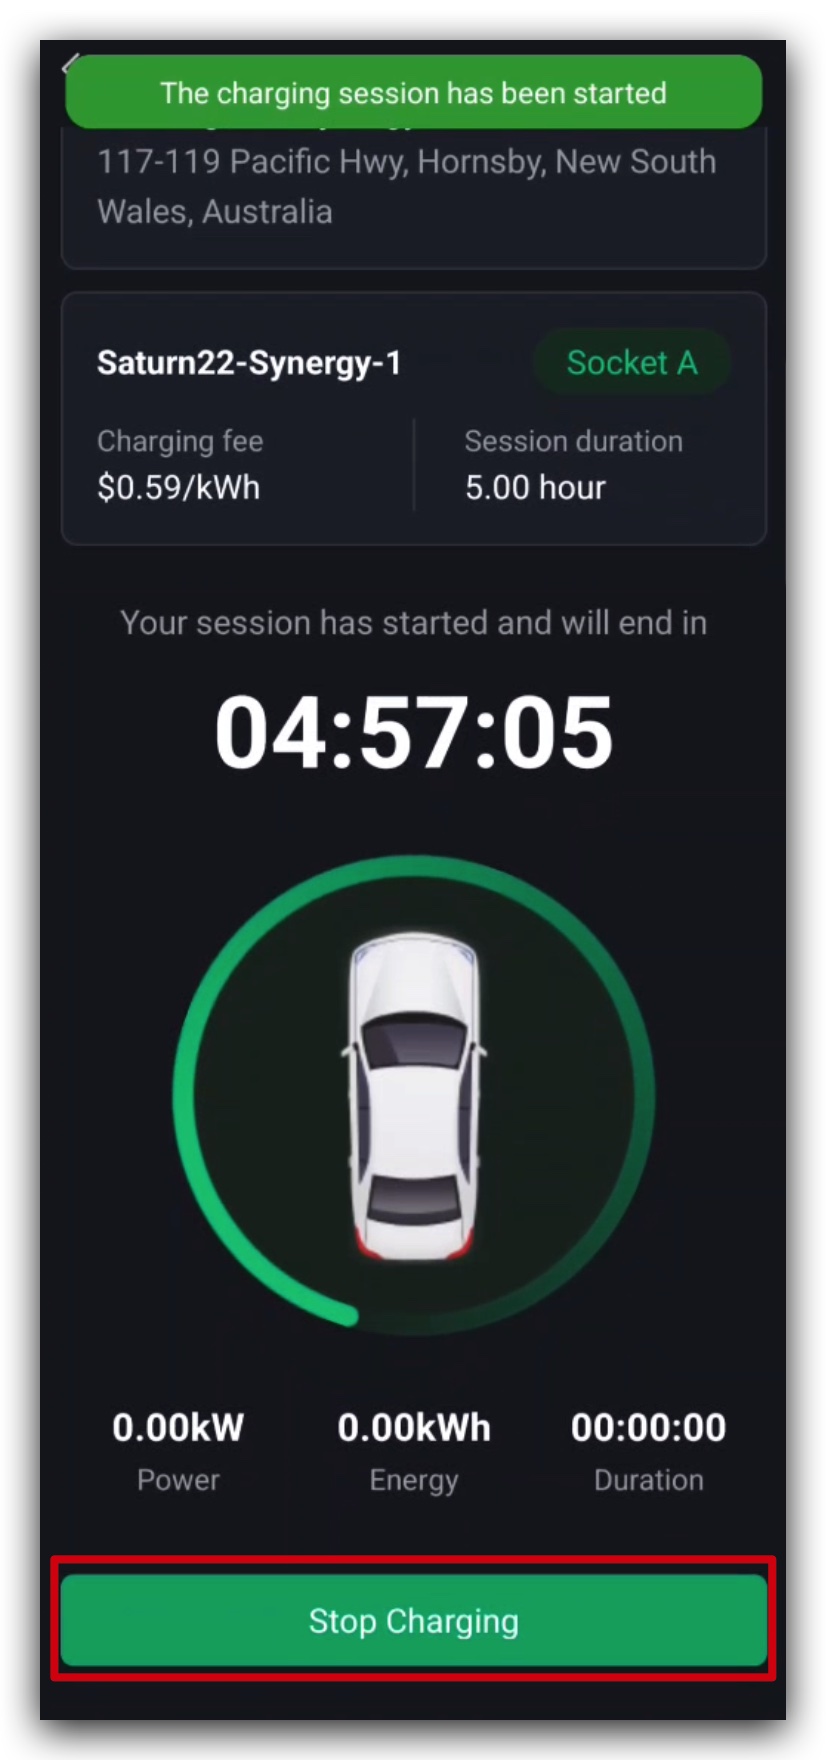
While charging, the app will display the following information, also shown in Figure 1.4.4:
- Current power being supplied
- Total energy delivered so far
- Elapsed time of your session
Step 3: Stopping Your Session
If you need to finish early, tap "Stop Charging" at any time (Figure 1.4.5).
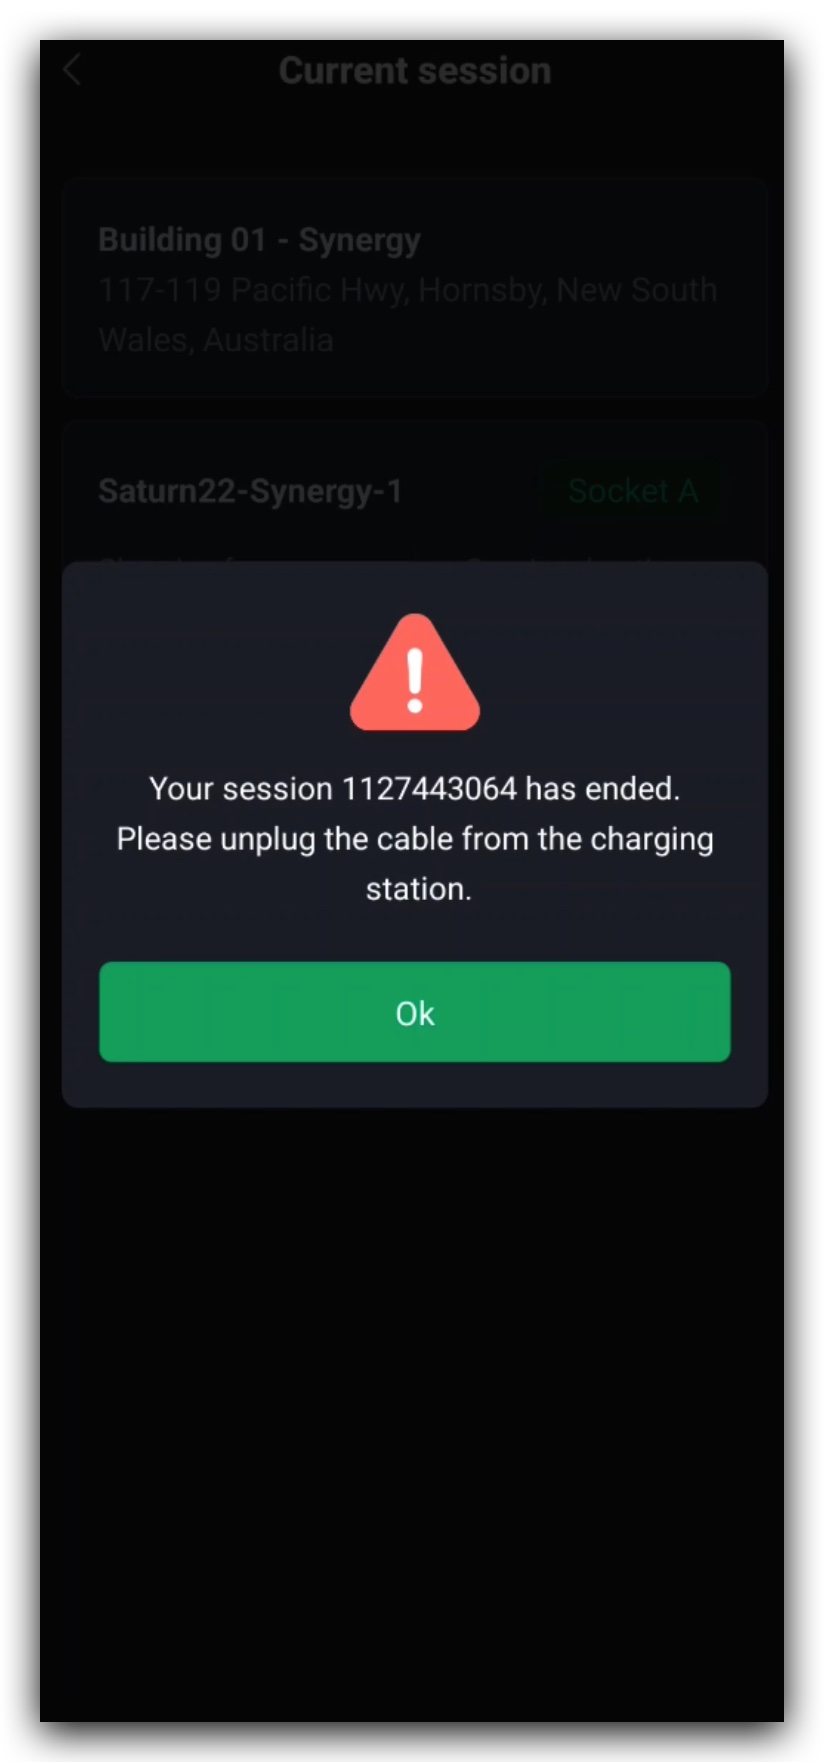
Once charging is stopped, you will be prompted to unplug the cable (Figure 1.4.6).
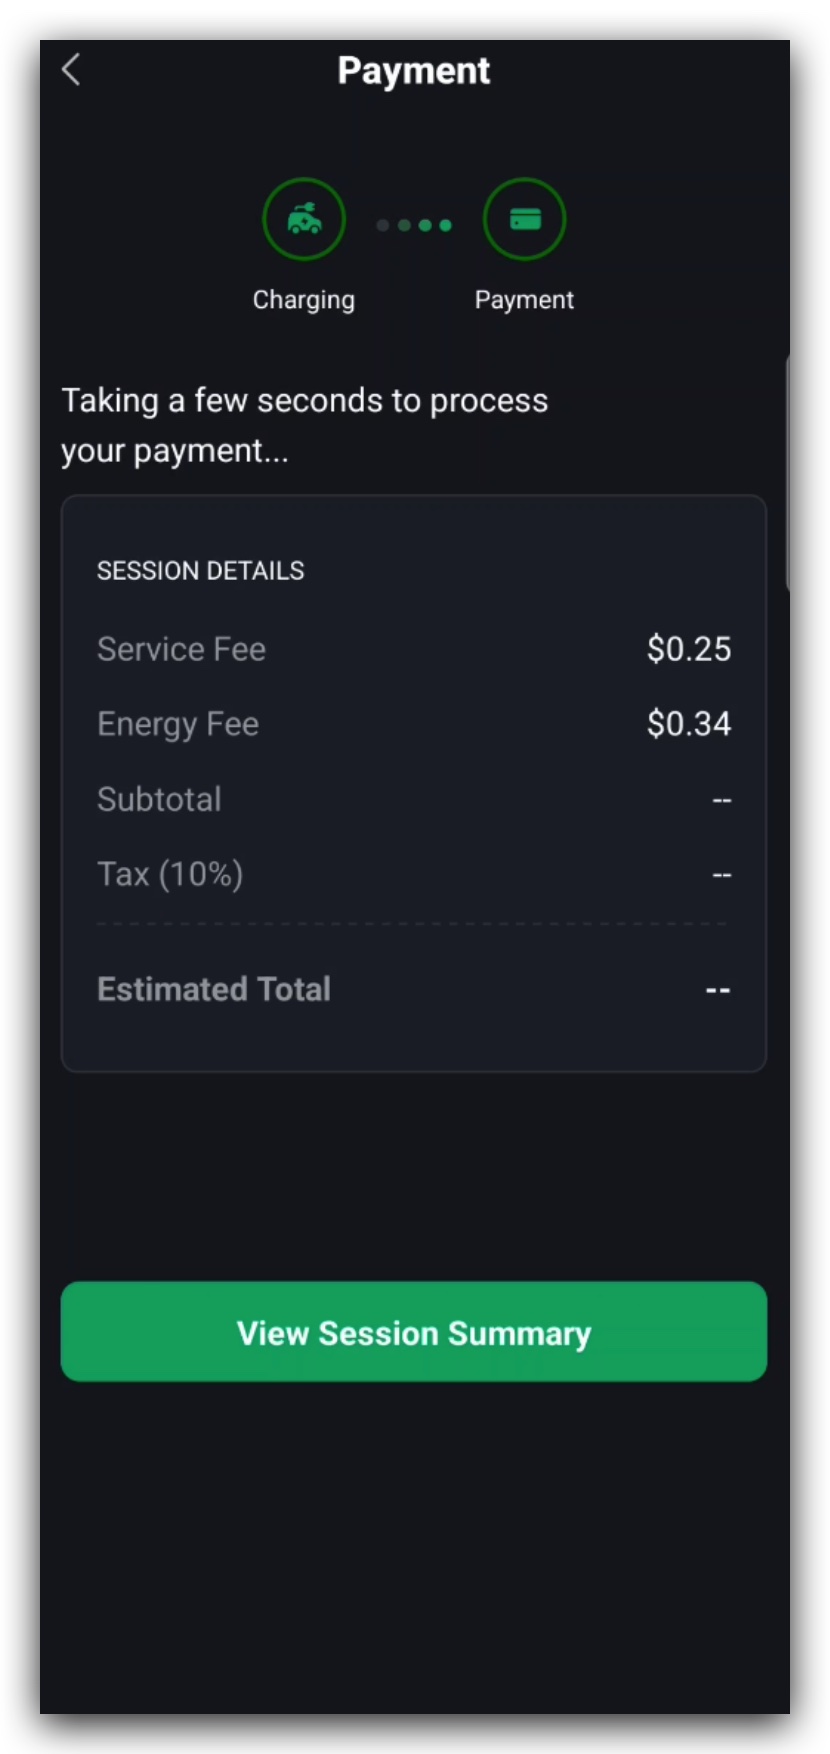
Your final fee will be calculated based on the time and energy used (Figure 1.4.7).
Important
You will only be billed for the exact amount of energy (kWh) your vehicle consumes.
The cost calculation starts only when your EV is connected and charging.